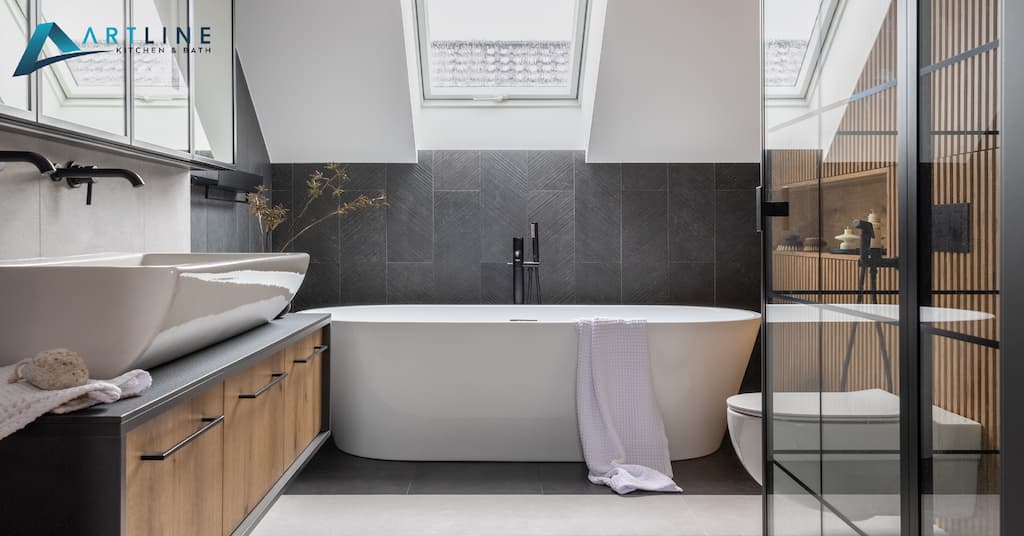
Bathroom vanity installation is a transformative project that refreshes your bathroom’s appearance and enhances its functionality. Whether you tackle this as a DIY project or prepare for professional installation, understanding the steps involved is crucial for success.
This comprehensive guide covers everything from selecting the right vanity that complements your bathroom’s size and style to the detailed installation steps. You’ll learn about the different types of vanities, such as freestanding, wall-mounted, and corner units, and how to choose one based on your bathroom layout and design preferences. We’ll also provide a list of essential tools and materials, outline preliminary preparation steps like measuring space and checking plumbing alignments, and offer step-by-step instructions for positioning, securing, and finalizing your vanity setup.
Additionally, this guide includes tips for customizing your vanity for optimal functionality and advice on maintaining your newly installed vanity to keep it looking its best. With the right preparation and approach, installing your bathroom vanity can be a smooth process that results in a beautifully updated space.
Installing a bathroom vanity can significantly refresh your bathroom’s appearance and improve its functionality, making it a pivotal project in bathroom vanity ideas for remodeling. Whether you’re a seasoned DIY enthusiast or embarking on your first home improvement venture, this guide aims to walk you through the process of installing a new bathroom vanity, from selection to final touches, seamlessly integrating it into your remodeling plans.
Table of Contents
ToggleStep 1: Choose the Right Vanity
Before installing, select a vanity that fits your bathroom’s size, style, and plumbing layout. Measure the available space carefully to avoid any sizing issues.
Bathroom Vanity Installation Types
Selecting the right bathroom vanity is a crucial step before installation, impacting your space’s functionality and aesthetic. There are three main types of vanities, each with its own installation benefits:
- Freestanding Vanities: Known for their versatility and easy installation, these can be placed anywhere plumbing allows, making them ideal for quick updates or DIY projects.
- Wall-Mounted Vanities: These provide a modern look and save valuable floor space. They require secure mounting to the bathroom wall for a sleek, floating effect.
- Corner Vanities: Designed to maximize space in smaller bathrooms, corner vanities fit snugly into corners, offering efficient storage without compromising movement.
Each type offers unique advantages, so choose based on your bathroom’s specific needs and layout to ensure an efficient and stylish installation.
Bathroom Vanity Size Selection
Selecting the right vanity size is crucial for a successful bathroom vanity installation, directly impacting the room’s layout and functionality. Here’s a condensed overview focusing on installation:
- Spatial Harmony: Choose a vanity size that fits well within your bathroom, allowing easy access, movement, and integration with other fixtures, avoiding a cramped or underutilized space.
- Storage Needs: Match the vanity size to your storage requirements, ensuring enough room for essentials without compromising the bathroom’s style.
- Plumbing Compatibility: To simplify installation, select a vanity that aligns with existing plumbing. Consider consulting a plumber for major layout changes.
- Aesthetic Balance: The vanity’s size should enhance the bathroom’s look, serving as a focal point or blending seamlessly, depending on available space.
- Customization: Custom-sized vanities can ensure a perfect fit for unique spaces, aiding in a smoother installation process.
Step 2: Preparing for Your Bathroom Vanity Installation
Thorough preparation is essential before installing your new bathroom vanity to ensure a seamless and successful project. This preparation involves gathering the necessary tools and materials and completing a series of preliminary steps to prepare your space for the new addition.
Tools and Materials You’ll Need for Bathroom Vanity Installation
- Tape measure for precise measurements
- Level to ensure your vanity is installed evenly
- Drill with various drill bits to make holes
- Screwdriver set for assembling and securing components
- Adjustable wrench for plumbing adjustments
- Plumber’s putty or silicone sealant to prevent leaks
- Pipe wrench for tightening plumbing connections
- Hacksaw for any necessary plumbing adjustments
- Stud finder to locate wall studs for secure mounting
- Wall anchors and screws for installing wall-mounted vanities
- Vanity and sink installation kit, if applicable, for specific hardware needs
Preliminary Steps
With your toolkit ready, follow these preliminary steps to prepare your bathroom for the new vanity:
- Measure the Space: Accurately measure the installation area to ensure the new vanity fits perfectly. Consider the width, depth, and height to avoid any sizing issues and ensure enough room for doors and drawers to operate smoothly.
- Check Plumbing Alignments: Assess the compatibility of your new vanity with existing plumbing. Ensure the water supply and drain lines connect seamlessly with your vanity’s plumbing fixtures to avoid any unnecessary adjustments.
- Locate Wall Studs: For wall-mounted vanities, locating the studs is crucial for a secure installation. Use a stud finder to identify stud locations and plan your mounting points accordingly.
- Plan for Electrical Outlets: If your vanity includes lighting or requires an electrical outlet, prepare for the electrical setup. Ensure compatibility with existing electrical sources and consult an electrician for any modifications or new installations.
- Remove the Old Vanity: Safely remove the existing vanity, if applicable. Shut off the water supply, disconnect the plumbing, and carefully detach the vanity from its position. This step may involve unscrewing the unit from the wall or cutting through sealant lines.
- Prepare the Area: Clear the installation zone of debris or obstructions. Clean the floor and walls, ensuring the surface is dry and level. This is also an opportune time to update the flooring or wall finishes before installing the new vanity.
Proper preparation for your bathroom vanity installation can lead to a more efficient process and a finished project that meets all your expectations for function and style.
Step 3: Position the Vanity
Carefully move the new vanity into position. Use a level to ensure it sits flat against the wall and floor. If the vanity has a separate countertop, wait to secure the base to the wall before attaching the top.
Step 4: Secure the Vanity to the Wall
Once in place, use a drill to secure the vanity to the wall studs. If your vanity doesn’t align with the studs, you may need to use wall anchors to firmly attach it.
Step 5: Install the Countertop
Apply a bead of silicone caulk along the top edge of the vanity base, then carefully set the countertop in place if your vanity includes a separate countertop. Press down to form a tight seal.
Step 6: Reconnect Plumbing
- Install the Faucet: It’s easier to install the faucet onto the countertop before securing it to the vanity, especially in tight spaces.
- Connect the Sink: Attach the sink to the countertop (if not already integrated) and seal it with silicone.
- Connect the Water Supply: Reattach the water supply lines to the faucet. Ensure connections are tight to prevent leaks.
- Install the P-Trap and Drain: Connect the sink drain to the home’s plumbing system, ensuring the P-Trap is installed correctly to prevent sewer gases from entering the bathroom.
Step 7: Final Touches
Apply a bead of caulk around the edges of the vanity where it meets the wall and floor to seal any gaps. This will also give the installation a finished look. Turn on the water supply and check for leaks.
Tips for Successful Bathroom Vanity Installation
- Double-Check Measurements: Always measure twice to ensure the vanity fits your space and accommodates existing plumbing.
- Inspect Plumbing: This is an excellent time to replace old shut-off valves or upgrade the sink’s P-trap.
- Seek Professional Help: Ask for professional assistance when moving the vanity or making plumbing connections.
Customizing Your Bathroom Vanity for Optimal Functionality
Once your vanity is installed, customizing and personalizing your bathroom vanity enhances its functionality and reflects your unique style. Here are four ideas for customization:
- Additional Shelving: Adding pull-out shelves or organizers inside the cabinet can maximize storage space and keep your items easily accessible. Consider custom-fit organizers for cosmetics, toiletries, and cleaning supplies.
- Lighting: Install under-cabinet lighting for a soft glow that enhances the ambiance and functionality of your bathroom. LED strip lights or puck lights can illuminate the interior of drawers and cabinets, making it easier to find what you need.
- Upgraded Hardware: Swapping out the standard hardware with stylish knobs and pulls can instantly update the look of your vanity. Choose finishes and designs that complement your bathroom’s decor for a cohesive look.
- Decorative Elements: Incorporate decorative elements that match your style, such as a vase of flowers, framed photographs, or a stylish tray to hold soap and lotion. These touches add character and warmth to the space.
Maintaining Your Newly Installed Bathroom Vanity
Proper care and maintenance ensure your bathroom vanity remains in top condition for years. Follow these tips based on the material and style of your vanity:
- Cleaning: Use a soft, damp cloth and mild cleaner suitable for your vanity’s material. Avoid harsh chemicals or abrasive scrubbers that can damage the finish. Use cleaners specifically designed for stone to prevent etching or staining for natural stone countertops.
- Protecting the Surface: Wipe up spills promptly to prevent water damage and stains. Consider using coasters or trays under toiletry items to catch drips. Ensure wood vanities are adequately sealed to resist moisture.
- Regular Inspections: Check the hardware periodically to ensure it’s secure and functioning correctly. Tighten any loose knobs or pulls and adjust hinges if doors or drawers become misaligned.
- Avoid Excessive Moisture: Ensure your bathroom is well-ventilated to prevent excessive moisture buildup, which can damage your vanity over time. Use fans or open windows to circulate air after showers.
Conclusion
In conclusion, installing a new bathroom vanity is a transformative project that can significantly enhance the appearance and functionality of your bathroom. Each step is crucial for a successful update, from selecting the right vanity that fits your space and style to preparing for installation with the necessary tools and materials. Whether you choose a freestanding, wall-mounted, or corner vanity, understanding the installation process and following it carefully ensures a smooth transition and a beautiful result.
Customizing your vanity post-installation with additional shelving, upgraded lighting, and decorative elements can further personalize your space. Remember, maintaining your newly installed vanity through regular cleaning and care will preserve its beauty and functionality for years. By paying attention to detail and considering your needs and preferences, you can achieve a bathroom that meets your practical needs and reflects your style.


